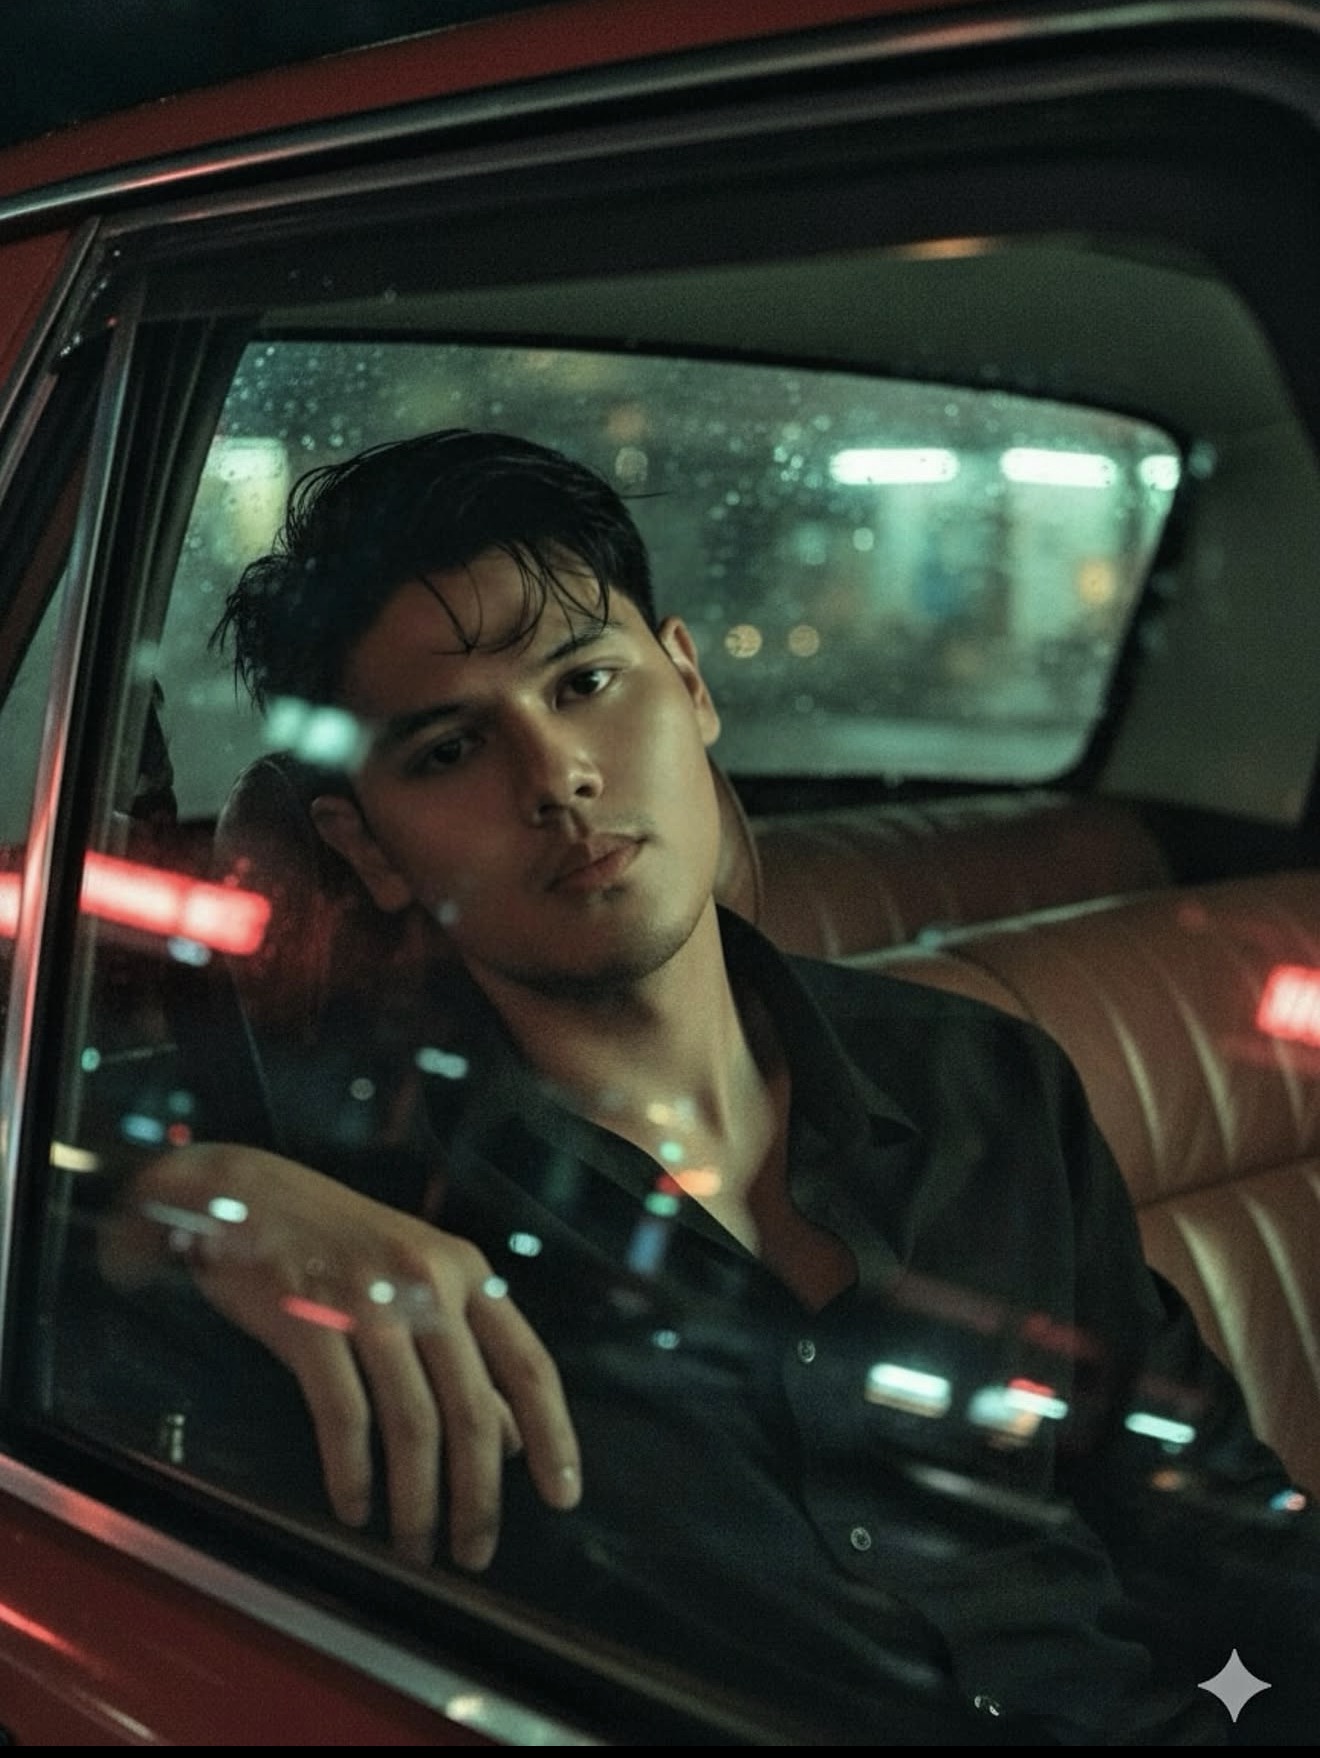
cinematic-style realistic portrait
Om editing top cinematic-style realistic portrait ka intro
Om editing top cinematic-style realistic portrait un logon ke liye hai jo apni simple photo ko ek moody, film-like aur high-end portrait me convert karna chahte hain. Yeh style khas taur par un users ke liye useful hai jo AI image editing, portrait enhancement, ya realistic social media profile visuals create karte hain.
Is look me face ka natural structure preserve rehta hai, lekin overall image ko ek dramatic, artistic aur cinematic feel milti hai. Aapko aisa output milta hai jo normal selfie se zyada polished, emotional aur premium lagta hai. Isi wajah se yeh style content creators, editors, Instagram users, aur beginner AI prompt users ke beech kaafi popular ho sakta hai.
Agar aap apni portrait photo me film-poster jaisa mood, soft blur, realistic skin detail aur urban atmosphere add karna chahte hain, to yeh editing style ek strong choice hai. Yeh un photos par bhi achha kaam karta hai jahan aapko natural likeness ke saath stylish transformation chahiye hota hai.
Ye prompt/photo style kya provide karta hai?
Om editing top cinematic-style realistic portrait ka main purpose hota hai ek simple image ko visually rich aur believable cinematic portrait me badalna. Isme focus sirf beauty par nahi hota, balki lighting, depth, background mood aur overall realism par bhi hota hai. Result aisa lagta hai jaise kisi movie scene se ek still frame liya gaya ho.
Is style me face ko over-edit nahi kiya jata. Instead, skin texture, facial features aur expression ko natural rakhte hue photo me subtle dramatic elements add kiye jate hain. Urban lights, rainy background, soft shadows aur glowing highlights image ko emotionally strong aur eye-catching banate hain.
- Realistic face shape: identity ko natural aur believable rakhta hai.
- Moody lighting: shadows aur highlights se cinematic effect create hota hai.
- Neon ya street reflections: urban feel ko aur strong banate hain.
- Soft blur aur glow: background ko depth dete hain bina subject ko lose kiye.
- Film grain effect: image ko authentic movie still jaisa finish deta hai.
- Premium mood: portrait ko stylish, emotional aur high-quality look milta hai.
Yeh style un photos ke liye best hota hai jahan aapko modern, intense aur realistic aesthetic chahiye. Casual photo ko bhi yeh prompt photo style ek cinematic portrait me change kar sakta hai, especially jab light aur framing sahi ho.
How to use it: step-by-step guide
Agar aap beginner hain, to tension lene ki zarurat nahi hai. Om editing top cinematic-style realistic portrait use karna mobile par bhi kaafi simple hota hai. Aapko bas ek achhi source photo aur sahi upload process follow karna hota hai.
Sabse important baat ye hai ki aap jis photo ko use kar rahe hain, usme face clear ho aur image blur ya overexposed na ho. Is style ka best result tab aata hai jab input photo already decent quality ki ho aur subject ka face clearly visible ho.
- Apni best portrait photo choose karein jisme face seedha aur clear dikh raha ho.
- Photo ko mobile gallery se open karke check karein ki background bahut messy ya dark na ho.
- Jis AI editing tool ya prompt-based editor ka use kar rahe hain, usme image upload karein.
- Prompt/style option me cinematic portrait ya realistic portrait style select karein.
- Output settings me agar options milein to realism, lighting aur detail ko priority dein.
- Generate karke result compare karein aur zarurat ho to better photo ke saath dobara try karein.
- Agar face detail loss ho raha ho, to zyada sharp aur front-facing image upload karein.
Mobile users ke liye ek practical tip ye hai ki photo upload karne se pehle uski crop aur brightness check kar lein. Kabhi-kabhi thoda sa straight crop aur normal exposure bhi output quality ko kaafi improve kar deta hai. Beginner users ko ek hi photo par multiple variations try karni chahiye taaki best cinematic result mil sake.
Which photos work best?
Is type ki editing me sabse achha result un photos se milta hai jahan subject ka face clearly visible ho aur image me unnecessary distraction na ho. Om editing top cinematic-style realistic portrait ka effect tab aur strong hota hai jab source image already balanced ho. Poor lighting wali photo kabhi-kabhi dramatic look de sakti hai, lekin face details kharab kar sakti hai.
Aapko aisi photo select karni chahiye jisme subject ka angle too much side me na ho, kyunki identity preservation aur realism ke liye front-facing ya slight three-quarter angle zyada useful hota hai. Background simple ho to cinematic editing ke liye AI ko subject par focus karne me asani hoti hai.
- Angle: front-facing ya halka sa side angle best rehta hai.
- Resolution: high-resolution image choose karein taaki face details preserve rahein.
- Lighting: natural light ya soft indoor light zyada suitable hoti hai.
- Background: plain, street-style, ya slightly blurred background better hota hai.
- Clothing: solid colors, jackets, hoodies, ya simple fashion wear cinematic feel ko enhance karte hain.
- Expression: neutral ya slightly serious expression moody portrait effect me achha lagta hai.
Agar photo me face par harsh shadow, overexposure, ya motion blur hai, to cinematic output utna clean nahi aayega. Isliye best practice yahi hai ki aap clear, stable aur naturally lit photo use karein. Isse AI ko realistic portrait banane me help milti hai aur final output zyada premium lagta hai.
Urban street background, rainy window effect, dark wall, ya softly lit indoor scene bhi achha kaam karta hai. Aise elements portrait ko depth dete hain aur cinematic-style realistic portrait ko aur believable banate hain. Simple words me, jitni clean aur balanced input photo hogi, utna hi strong final result milega.
Om editing top ke liye pro tips for the best results
Agar aap Om editing top style me cinematic-style realistic portrait banana chahte hain, to sabse pehle base photo ki quality par dhyan dena zaroori hai. Clear face, proper lighting, aur front-facing ya slightly angled pose output ko kaafi better bana dete hain. Jitni clean source image hogi, utna hi realistic portrait result milega.
Ek aur important point hai balance. Cinematic look me drama achha lagta hai, lekin face details ko hide nahi hona chahiye. Isliye soft blur, moody light, aur background atmosphere ka use smart tarike se karein. Om editing top ka best output tab aata hai jab subject sharp rahe aur background subtle cinematic feel de.
- High-resolution portrait photo use karein taaki facial features clear rahen.
- Seedha ya thoda side-angle pose choose karein, jisme face easily visible ho.
- Natural expression rakhein, over-smile ya over-editing se bachें.
- Background me urban, night, ya rainy feel add karein taaki cinematic depth aaye.
- Lighting ko dramatic rakhein, lekin skin tone ko unnatural na banne dein.
- Face identity maintain karne ke liye harsh filters se bachें.
Agar aap social media ke liye portrait bana rahe hain, to composition bhi matter karti hai. Face center me ho, shoulders visible hon, aur frame me extra clutter na ho. Is tarah Om editing top look zyada premium, clean, aur polished dikhega.
Common mistakes to avoid in This Style portrait style
Sabse common mistake hoti hai low-quality image upload karna. Blur photo, motion blur, ya too-dark selfie se face details loss ho jati hain. Iska result ek aisa portrait hota hai jo cinematic ke bajay messy lagta hai. This style ka purpose realistic finish dena hai, isliye base image strong honi chahiye.
Dusri mistake over-editing hai. Agar aap bahut zyada glow, shadow, ya color effect add kar dete hain, to face unnatural dikhne lagta hai. Yeh style ka charm subtle cinematic vibe me hota hai, not excessive filters. Isliye editing me restraint rakhna zaroori hai.
- Too dark photo: Face details gum ho sakti hain aur output unclear lagta hai.
- Over-sharpening: Skin artificial aur rough dikh sakti hai.
- Heavy blur on face: Identity preserve nahi hoti, jo realistic portrait ke against hai.
- Mixed background elements: Busy background subject ko weak bana deta hai.
- Wrong crop: Head ya shoulders ka part cut ho jaye to portrait balance bigad jata hai.
- Color mismatch: Skin tone aur background ka contrast agar unnatural ho, to image fake lagti hai.
Ek aur galti hoti hai style ko har photo par same tarike se apply kar dena. Har image ka lighting, angle, aur mood alag hota hai. This prompt style me thoda customization zaroori hai taaki har portrait apni natural identity ke saath cinematic lage.
This Style ke best use cases aur creative ideas
Ye cinematic-style realistic portrait kaafi versatile hai aur alag-alag platforms par use kiya ja sakta hai. Agar aap Instagram profile ko premium look dena chahte hain, to ye style instantly attention grab karta hai. Face clear rehta hai, aur overall image me ek stylish, film-like presence aati hai.
Profile pictures ke liye bhi this look ka look bahut useful hai. Professional yet artistic avatar chahiye ho to yeh style strong choice ban sakta hai. Creator profiles, personal branding, ya aesthetic online identity ke liye aise portraits kaafi impact create karte hain.
- Instagram posts: Cinematic feed banane ke liye perfect.
- Profile pictures: Stylish aur memorable first impression ke liye.
- Thumbnails: YouTube ya reel thumbnails me strong visual appeal ke liye.
- Portfolios: Creative work ya personal branding showcase karne ke liye.
- Reels covers: Consistent, premium aesthetic maintain karne ke liye.
Is style ko aap event posters, mood edits, ya fashion-inspired portraits me bhi use kar sakte hain. Agar aapko story-based visual content banana pasand hai, to urban night look, rain effect, ya neon background ke saath yeh style portrait aur bhi striking ban jata hai.
Variations you can try with This Style
Aap is portrait style ko ek hi mood tak limited nahi rakhna chahte to different variations try kar sakte hain. Har variation photo ko naya feel deta hai, lekin realistic face identity ko preserve karta hai. Isi wajah se this edit style experiment-friendly bhi hai.
Seasonal changes bhi interesting result dete hain. Winter mood me cool tones aur foggy atmosphere achha lagta hai, jabki monsoon look me wet streets aur reflections cinematic feel ko strong banate hain. Summer version me warm sunlight aur golden highlights image ko soft aur elegant bana sakte hain.
- Dark moody version: Deep shadows, low light, aur serious expression.
- Neon night version: Blue, pink, ya purple reflections ke saath urban style.
- Rainy street version: Wet background aur reflective surface ke saath dramatic look.
- Warm cinematic version: Golden light aur soft contrast ke saath polished portrait.
- Vintage film version: Grainy texture aur muted colors ke saath classic feel.
- Minimal clean version: Less background drama, zyada focus face aur expression par.
Aap colours ke saath bhi play kar sakte hain. Cool tones image ko intense aur modern banate hain, jabki warm tones emotional aur soft effect dete hain. Agar aap thoda experimental feel chahte hain, to black-and-white cinematic variation bhi this style style ko ek timeless look de sakti hai.
Conclusion: This Style se apna cinematic portrait try karein
This prompt style cinematic-style realistic portrait banane ke liye ek powerful approach hai, especially jab aapko natural face detail ke saath moody, film-like output chahiye. Isme realistic look, dramatic atmosphere, aur polished finish ka perfect blend milta hai.
Agar aap apni photo ko next-level aesthetic dena chahte hain, to clear base image, smart lighting, aur subtle editing ke saath experiment karein. This look ka best result tab aata hai jab aap detail aur mood dono ka balance banaye rakhte hain. Ab is style ko try karke dekhiye aur apne portraits ko cinematic look dijiye.
💬 Comments